C#.net MessageBox
I am back again for new tutorial in C#.net Message-box.Today we are using
C#.net Message-box for Show one message in display.This is a simple program .
Let’s start the program. So we will work step by step.First need a
windows form .Then create a new button and we
have to setup a new message use building method in MessageBox.Show(); .
OK lets go start .
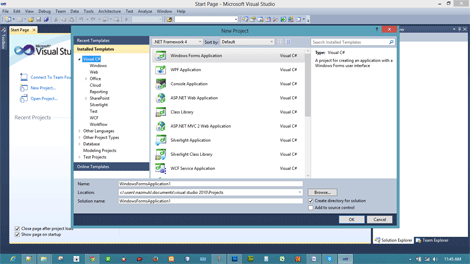
File>New>Project>WindowsForm Click
First
will then make a design follow this picture
.
Double-click on the Message Box In
here. Maybe the same code show in here .
This method exactly write the place where
is cursure is show.
MessageBox.Show();
If we write the
message in here the message show in same code.
using System;
using
System.Collections.Generic;
using
System.ComponentModel;
using
System.Data;
using
System.Drawing;
using
System.Linq;
using
System.Text;
using
System.Windows.Forms;
namespace Messagebox
{
public partial class Form1 : Form
{
public
Form1()
{
InitializeComponent();
}
private
void button1_Click(object
sender, EventArgs e)
{
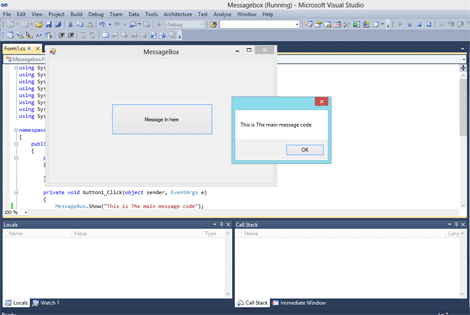
MessageBox.Show("This is The main message code");
}
}
}
Please click the debug program.The message
look like same.
When debugging is complete then click the Message
button .and look at the picture for result ...
I have a source file, I want to share with you you can download
this source file..
Thank
you for watching this tutorial. Please wait for my next tutorial. I hope this
tutorial is better for all beginner.
Thank
all